Monday, June 11, 2012

House 2 Home: Vance style


Welcome to our first House 2 Home spotlight.  I'm so excited to show you how amazing my uncle's home in Utah is.  He's really great at leaving personal touches in architectural details and my aunt is really great and making the whole house look so cute.

One thing you should notice about the front of their house is the archway above their front door.  If you look closely, you'll notice the letter "V" above the arch.  I've seen him do this in other places which shows he's proud to be a Vance.  Much like what Thomas Kinkade does with his pictures when he hides a letter "N" for his wife's first initial.  Look it up!  It's fun to look for.


As you walk to the front door, the pathway you walk on is very rough and organic feeling with it's textured cement treatment.  I've also figured it is required of every Utah resident in the area to have a gorgeous display of flowers in your yard.  This home is no different.


This front door with rich warm tones and knots is amazing and the welcome wreath puts all of mine to shame.


I know this might seem like an out of place picture to this post, but I wanted to use it to show just how much thought and work my uncle puts into his home. Have you ever thought about your ceiling being something wonderful to look at?  If you look close (there is a closer image next) he's treated his ceiling in no other way I've ever seen.  I asked him how he did it.  There is a brush sold in hardware stores with the bristles spread out in this way.  As he was preparing to texture the ceiling, he dipped the brush in the texture then scraped it flat.  Once that was dried, he painted the ceiling with wall paint mixed at 25% what the room was and spread it on the ceiling.  Caution: the way you treat your ceiling could have a profound effect on your acoustics in the room.  However, this had no problem or strange effects that would deter you from it's beauty. (I'm quirky about it, I know.)


Here's a cool idea.  Ever hate that feeling of needing to go to the bathroom in the middle of the night, but dread turning on the light for fear of burning your eyes right out of their sockets? Why not install lights under your counter?  This soft glow will surely keep that sleep in your eyes while you find your midnight relief.  I can't remember what material he used for the countertop, but in the commercial design world, there is a material called 3-Form that can be treated the same way.

And if your bathroom is too far to go in the night, install some crown molding with lighting above!


I love the rawness of this wood floor!  You can see every groove as if each plank were hand carved.  Talk about TLC!


I've been seeing a lot of bead board on the walls lately and I'm in love.  It's not too often that I find it in a wood tone.  This paired with the floors gives me nice warm fuzzies inside.


As a mom, this has to be my favorite personalized feature of the house.  This pantry door closes flush with the wall and looks like it's not even there.  The facade of it holds two sizable cupboards for spices, seasonings and baking goods.  When the pantry door is opened, a motion sensor detects it and turns on the light.  BRILLIANT!


Not only do they hide the pantry door, but this bench also doubles as a trash drawer.  
If you don't have one, GET ONE!


Everyone wants to be in this kitchen.  I'm sure I would enjoy doing dishes more here than at my house with a deep apron sink and a 2 drawer dishwasher that can be run with both or just one of the drawers at a time!  You can't see the microwave drawer very well, but it's there and it rocks!

I was in this area of Utah for less than 24 hours, but managed to see quite a bit of beautiful scenery.  It was great seeing family in their homes instead of waiting for them to come to Arizona.  Had it not been so cold and windy while we were there, I'm sure I would have spent more time on their back balcony over looking this view of the valley.


In the center you'll see the Mount Timpanogos Temple and dotted all around are the LDS chapel steeples.  Yep, this is Utah after all.   


I hope you enjoyed the first House 2 Home spotlight.  I hope you found some things inspirational to try in your homes.  

If you know of a home you'd like to see in the series, please leave a comment with your email and I'll be in contact with you.

Linked to:

Monday, June 4, 2012

New Beginnings!

So many things have changed for me over the last couple of months, hence me not being on top of the blog.  However, with change comes new beginnings.  My husband starts a new job today, I'm completing my 6th quarter of school (and ready for summer break).  My oldest daughter is preparing herself for 3rd grade.  My youngest daughter is finally potty trained!  Oh, and did I mention a new season of Design Star has started?  Of course I'm rooting for the Arizona contestant and not just because I'm from Arizona. Yes, I'm sure I'll be talking about it every week.


I also wanted to take a moment to prepare you for my upcoming series on the blog called 


House 2 Home  

I got this idea from Apartment Therapy's House Tours, but I like to add my own rendition.  This series will feature homes that I've visited that have creative uses of space and decor.  Little punches of personality can really change a space from feeling like a house to a home. (Get it?)


So keep in touch to see the beautiful Vance home I visited in Utah this last month.  You're going to want to see this!


Saturday, February 25, 2012

Work in progress


{B}'s room was redone and my 3 yr old {T}'s room was neglected.  So I decided I had some materials on hand to at least get a start on what I wanted to have happen in her room.  


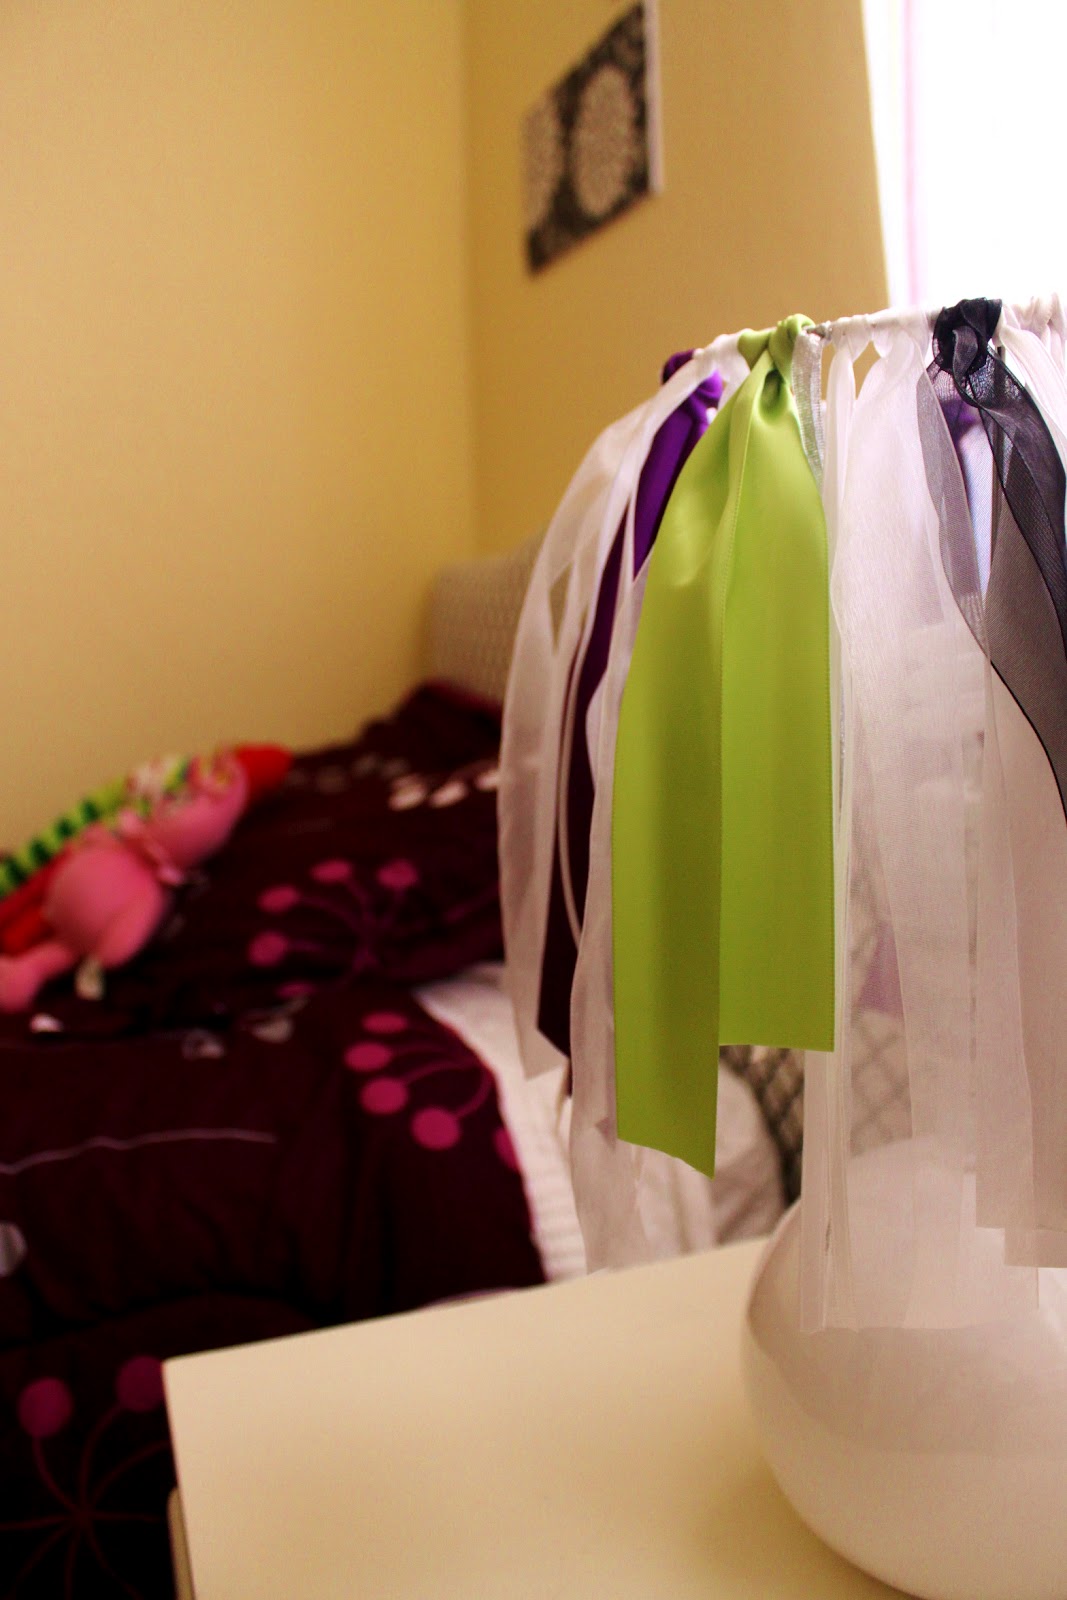
I started with a lamp I had that I ripped the shade off.  The prior shade was all white, but had a bright pink lining which made everything look pink when I turned it on.  So I kept the wire frame for it and tied some spare ribbon I had in "tutu" fashion around.  I mixed up the color and texture to give it some contrast and stand out from the white base a little more.  Although I may still spray paint the base in the near future.


The next part was some wall art.  One of the great perks of going to design school is the Resource room they have for the Interior Design students.  We just got in this HUGE amount of wall paper books so I get to bring home some discontinued samples and play around with them however I like.  So I attached some to foam core and made some instant wall art for the room.


You might remember this little dresser/nightstand from a recent post.  But I added just a little something extra as I lined it with the same contact paper I used for {B}'s desk.  


My in-laws were so generous to give us a twin bed.  It had an old cream vinyl like material upholstery on it so I decided to cover it, first with batting to give it some of that comfortable look and then with this fun geometric graphic I found at Hobby Lobby.  Where would I be without a staple gun?  I'm just to scared to imagine.  The bed set came from Target and the curtains (which you can't see very well cuz they will be soon replaced) I sewed from clearance fabric at Country Curtains.


So just this little corner is done for now, but the plans are to make the other side of the room toy and dress up storage.  My {T} loves to pretend so here's where it's going to get fun. You'll have to wait and see until I'm done with it.  


Linked up to:
Positively Splendid Creations by KaraIhookedupwithHoHlamespice shabby creek cottageFurniture Feature Fridays504 Main

Monday, February 20, 2012

Happy President's Day

Happy President's Day everyone!  I get to spend it at school.  (*yeah*)  While I have some down time, I'd like to share some inspiring spaces I've found that are "American" inspired.

2722955217_d487c3370b_rect540
Who doesn't love a red painted wood stump to sit on? 
as seen on:
Apartment Therapy


I like how there's a Navajo inspired rug mixed into the group.  Authentic, right?
as seen on
DJD Design


My favorite part of America is the beach :)
as seen on:
Bear Hill Interiors


I'm totally diggin' this industrial look!  I love the contrast these colors bring out.
Shared by Design to Inspire

blue double soaker tub and oriental rug bathroom by Mary Watkins Woods
This absoluetly looks relaxing!  I love the solids mixed in with the unexpected patterns.  It truely makes the space feel used. And how cool are those towel racks?!
as seen on
Attic Mag

katie ridder

So Happy President's Day everyone! I hope you got to enjoy a day off!

Thursday, January 26, 2012

From Plain to Dame!

Week 3 of 11 this quarter and the homework is piling on!  I'm glad I go this done before the real swarm of design homework projects began.  This quarter has a full blown holistic day spa design (start to finish), learning all about building codes, how to make pretty presentations, and learning a whole new computer design program.  My career as a designer is becoming more real and I feel like my talents are growing!

To keep my sanity, I must have something completely under my control at home that I can call mine and work on when I want to.  So, here's another of my fabulous garage finds I found recently.  I got this two drawer nightstand along with a coffee table (not completed yet).  The top drawer originally looked like the bottom one, but I was experimenting with the Pottery Barn Finish you can see applied here.


So it started out looking like a "plain jane" nightstand you can find at any Target for cheap and I thought I would dress it up a bit.


I went to Al's Hardware and Materials out in AJ and picked up some pretty sweet trim and base boards for $10.  I got to use my air compressor and miter box (cuz I'm too cheap to by a miter saw) I got for Christmas!  This is exactly the project I had in mind when I asked for them :)


Here's her reveal!  I stuck with the same hardware because it was the nicest thing on the piece.  


Linked up:
Remodelaholic  Thirty Handmade Days   504 Main   It's a Hodge Podge Life   
Fingerprints on the Fridge   Miss Mustard Seed   A Little Inspiration   House of Hepworths
A Glimpse Inside   Creations by Kara

Sunday, January 22, 2012

Winner Winner Chicken Dinner!

Okay, there's no chicken dinner other than the one my husband is so kindly cooking up for our Sunday dinner.  Time to announce the winner of my first giveaway.  Thanks to those of you who entered/followed/"Liked" the Giveaway.

I hopped onto the first random number generator I could google and here are the results!


So we go to the 12th entry and we find:


Congratulations Hollister :) I'll be contacting you with details on your tickets.

Thanks again everyone for participating.  Don't worry, there will be more in the future!


Wednesday, January 18, 2012

Potty Pops anyone?

A lot of my friends are going through potty training with their kids right now.  So am I . . . kind of.  With my busy schedule it's hard to keep any kind of consistency with my 3 year old. Last week for example, we were home all day Tuesday and she wore panties all day, and went potty in the toilet twice.  The next day, I had school and she insisted on wearing panties to Grandma's house (my mother in law).  With hesitation, I went along with it as I packed extra clothes "just in case."  When I came home that night, my husband, who picks up the kids on the way home from work, announced that she pooped in her panties while she was at Grandma's to which the voice in my head does a very loud "GRRR!"

I've never really had success in potty training kids.  My now 7 year old was trained by a co-day care worker.  I went to work at a day care with my daughter in tow when she was almost 3.  Any attempts before that were met with the same frustration.  In fact, my oldest attempted flushing her clothes down the toilet succeeding with my favorite green shirt with a felt butterfly appliquéd on the front.  Luckily the denim shorts didn't make it.

So inspiration hit me today in the form of a creative outlet.  Kids like to see their reward and know how to get it so I created some bathroom decor for my 3 year old to find more motivation.

Introducing the Potty Pops!


Ingredients (aka supplies):

2x4 cut to about 7 inches
sandpaper
drill
paint
fabric mod podge
fabric cut to 3x7
stencil
double stick tape
sponge brush
suckers (I chose dum dums because they are smaller and it doesn't take her forever to finish them)

After cutting and sanding your block.  Drill holes in the top.  It's fun to do it at different angles, just make sure the holes don't run into each other.  

Paint your block. (I spray painted)

Apply the fabric mod podge to face of block, put your fabric on, let it dry, then seal it with the mod podge.

Create a stencil by finding a font you like, print it out and exacto knife the pieces.  Adhere it to the block with double stick tape, even the middle of the p's and o's.  Or if you have one, just cut vinyl for it, but I feel the stencil makes it look more handmade.


(Yes, this is what I'm doing instead of homework. . . again.)

Once it's dry, it's ready for display.  Now cross our fingers that it works! PS I don't recommend putting this on the counter where little hands can reach on their own.  Find a nice display shelf to put in your bathroom and place it on there.


Don't forget to enter the Giveaway for 2 tickets to Glitter Academy!


Tip Junkie handmade projectsConfessions of a Stay At Home MommyCreations by Kara
Lil' Luna                       Blue Cricket Design


shabby creek cottageCatch a Glimpse ButtonIhookedupwithHoHlamespice
Thirty Hand Made DaysTickled Pink at 504 Main