Saturday, December 24, 2011

Mason jar pin cushion

My husband's family does a name exchange for Christmas and I got his Aunt who I don't know as well as I probably should.  After a few phone calls and conversations with my mother in law, I got to know Aunt Mara pretty well (I know she doesn't follow blogs so I'm safe in posting this).  She likes to craft and at a recent craft night, my m-i-l noticed Mara was still using the store container she got when she purchased her straight pins.  Enter me, the problem solver!  I immediately thought of this wonderfully easy craft.  I'm sure there are many others like this on the internet, but I didn't look at a single one!  Once I get a clear vision of what to do, there is no stopping me.  So here's how I did it:

Ingredients (aka supplies):
Mason jar with 2-piece lid (any size works, but I had these cute squatty ones on hand)
about 1 sq ft of cute fabric
stuffing (the more you have, the tighter your cushion will be)
magnets
hot glue


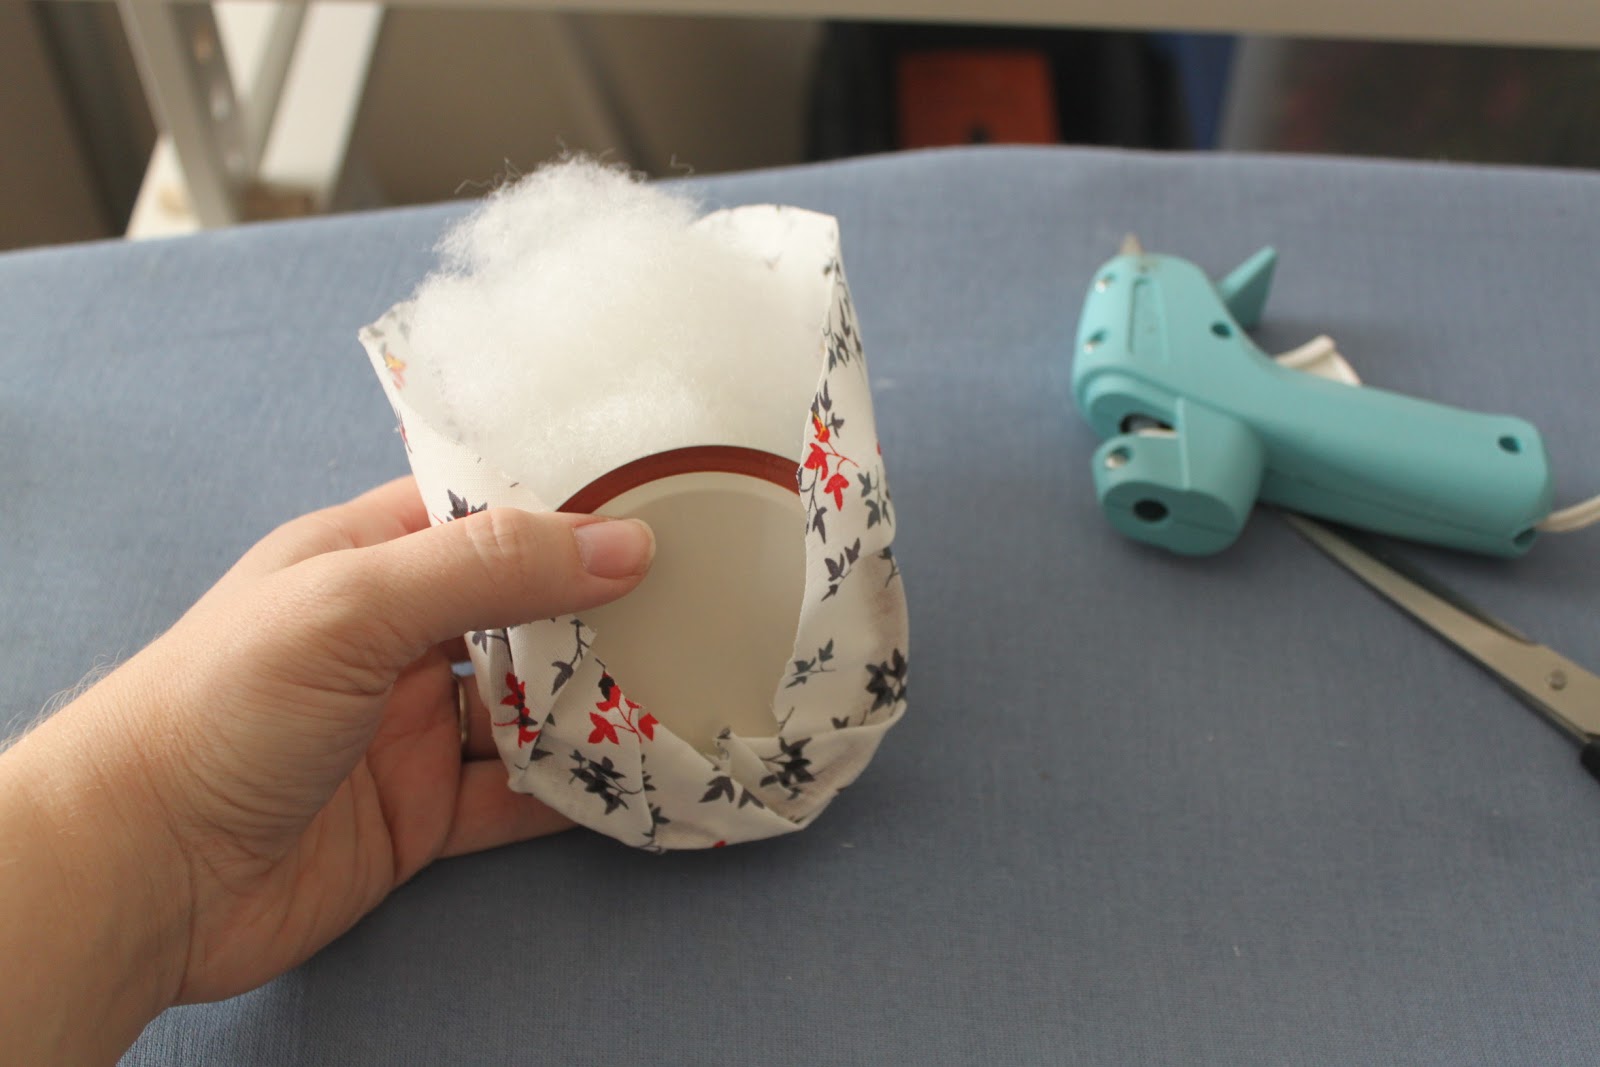
So, to get started, cut out your fabric about an 1" larger than your flat piece of the lid.  Next, put glue on the flat lid piece in about 1" sections and fold your fabric up and over. NOTE: You don't want to use too much hot glue because it will be hard to put your lid on when it's done.


 Before finishing off the lid, put your stuffing in as full as you'd like. I like'd mine to be pretty tight so that there wouldn't be any sliding around.


 Once your fabric is glued on, cut off any excess so it doesn't bunch.  Now you can add your magnets.  I used about 4 in the empty space between the ends of the fabric underneath the lid.  To hide the magnets, cut another circle out of your fabric and hot glue it on the bottom.  Again, don't use too much hot glue or your lid won't screw on properly.


 Here's your finished product!


 Just fill it with straight pins and you are good to go.


Hopefully, if you're following this, you know that when I craft I like to make it as quick and easy as possible.  I take a lot of time when it comes to furniture, but crafts like this take very few minutes and solve hours of problems.  I hope you spend your time wisely this Christmas season and enjoy every minute with your family and loved ones!

Saturday, December 17, 2011

5 minute Christmas Wreath

So it's kind of embarrassing for me to admit that I don't own a Christmas wreath.  I've never really found one that I've fallen in love with.  I finished up school this last week and I finally found the time to think about taking care of that lonely, empty wreath hook on my front door.  As I was trying to convince myself to set a budget on what to spend on a wreath, I realized I had everything I needed for one already and it would only take me a few short minutes to put together.  Here's what I did:

I have this garland that I picked up from Home Depot last year after Christmas for 75% off (total $3).


 I wrapped it up in a circle. Voila!  Not done . . .


I discontinued these garlands from my christmas tree and they've just been sitting in storage, but together they create the perfect candy cane pattern.


Wrap them around the wreath . . .


Place a nice bow on the bottom and you're done!


Problem solved!  Seriously, 5 minutes.  It doesn't get better than that.  Maybe next year I'll go more elaborate, but now I feel comfort knowing that hook on the door isn't naked anymore.

Thursday, December 8, 2011

Yellow + Stripes = Love

I got this wonderful piece from my neighbor after she set it out on the curb with a FREE sign on it.  A black widow got to it before I did, but my husband quickly solved that problem. So it sat in my garage for about a month or two and was actually serving its storage purposes, but my husband wanted it in his office.  

We decided to make his office the December project around here (which will be posted as soon as it's done) so he cleaned up his office as soon as I started sanding the shelves.  Obviously I'm still a little new to blogging about my projects because I didn't think to take a before pic until the first coat of paint was already on. 


My hubby picked the color.  I had to replace the back panel (which was really fun demo work for me :) so we came up with a cool idea of painting stripes on the back.  He even helped me with the taping.  Working with color is taking me out of my comfortable neutral bubble.  I welcome the challenge!


After we paint the whole room (the same gray as the stripes) we'll be ready to place the furniture and accessorize.  I'm so excited!  Thanks again Stacey for the shelf!

One more week and I'll be one quarter closer to having my Interior Design degree!  Only 8 more to go. *sigh*