Saturday, December 24, 2011

Mason jar pin cushion

My husband's family does a name exchange for Christmas and I got his Aunt who I don't know as well as I probably should.  After a few phone calls and conversations with my mother in law, I got to know Aunt Mara pretty well (I know she doesn't follow blogs so I'm safe in posting this).  She likes to craft and at a recent craft night, my m-i-l noticed Mara was still using the store container she got when she purchased her straight pins.  Enter me, the problem solver!  I immediately thought of this wonderfully easy craft.  I'm sure there are many others like this on the internet, but I didn't look at a single one!  Once I get a clear vision of what to do, there is no stopping me.  So here's how I did it:

Ingredients (aka supplies):
Mason jar with 2-piece lid (any size works, but I had these cute squatty ones on hand)
about 1 sq ft of cute fabric
stuffing (the more you have, the tighter your cushion will be)
magnets
hot glue


So, to get started, cut out your fabric about an 1" larger than your flat piece of the lid.  Next, put glue on the flat lid piece in about 1" sections and fold your fabric up and over. NOTE: You don't want to use too much hot glue because it will be hard to put your lid on when it's done.


 Before finishing off the lid, put your stuffing in as full as you'd like. I like'd mine to be pretty tight so that there wouldn't be any sliding around.


 Once your fabric is glued on, cut off any excess so it doesn't bunch.  Now you can add your magnets.  I used about 4 in the empty space between the ends of the fabric underneath the lid.  To hide the magnets, cut another circle out of your fabric and hot glue it on the bottom.  Again, don't use too much hot glue or your lid won't screw on properly.


 Here's your finished product!


 Just fill it with straight pins and you are good to go.


Hopefully, if you're following this, you know that when I craft I like to make it as quick and easy as possible.  I take a lot of time when it comes to furniture, but crafts like this take very few minutes and solve hours of problems.  I hope you spend your time wisely this Christmas season and enjoy every minute with your family and loved ones!

Saturday, December 17, 2011

5 minute Christmas Wreath

So it's kind of embarrassing for me to admit that I don't own a Christmas wreath.  I've never really found one that I've fallen in love with.  I finished up school this last week and I finally found the time to think about taking care of that lonely, empty wreath hook on my front door.  As I was trying to convince myself to set a budget on what to spend on a wreath, I realized I had everything I needed for one already and it would only take me a few short minutes to put together.  Here's what I did:

I have this garland that I picked up from Home Depot last year after Christmas for 75% off (total $3).


 I wrapped it up in a circle. Voila!  Not done . . .


I discontinued these garlands from my christmas tree and they've just been sitting in storage, but together they create the perfect candy cane pattern.


Wrap them around the wreath . . .


Place a nice bow on the bottom and you're done!


Problem solved!  Seriously, 5 minutes.  It doesn't get better than that.  Maybe next year I'll go more elaborate, but now I feel comfort knowing that hook on the door isn't naked anymore.

Thursday, December 8, 2011

Yellow + Stripes = Love

I got this wonderful piece from my neighbor after she set it out on the curb with a FREE sign on it.  A black widow got to it before I did, but my husband quickly solved that problem. So it sat in my garage for about a month or two and was actually serving its storage purposes, but my husband wanted it in his office.  

We decided to make his office the December project around here (which will be posted as soon as it's done) so he cleaned up his office as soon as I started sanding the shelves.  Obviously I'm still a little new to blogging about my projects because I didn't think to take a before pic until the first coat of paint was already on. 


My hubby picked the color.  I had to replace the back panel (which was really fun demo work for me :) so we came up with a cool idea of painting stripes on the back.  He even helped me with the taping.  Working with color is taking me out of my comfortable neutral bubble.  I welcome the challenge!


After we paint the whole room (the same gray as the stripes) we'll be ready to place the furniture and accessorize.  I'm so excited!  Thanks again Stacey for the shelf!

One more week and I'll be one quarter closer to having my Interior Design degree!  Only 8 more to go. *sigh*

Tuesday, November 15, 2011

What did you do with your Pumpkin seeds?

As we were carving our pumpkins I was loving how pretty the texture of pumpkin seeds were.  I'm not a fan of eating them but I thought they'd come in handy for a project I had brewing in my mind.  I quickly gave my 7 year old the job of picking out the seeds from the pumpkin "guts" we had piled in a dish.  She didn't stick with it very long since we had two fairly large pumpkins going at the same time so I got to finish.  

I finally finished my online class last week and was able to finished a project I had started for the first time in a month.  Thank goodness for "a little" time to myself again.

So here's the finished product of my Pumpkin Seed Topiaries.  My husband thought I was nuts, but he actually approved of it's coolness and uniqueness. 


All it takes is:
Pumpkin seeds (wash, then dry, then bake them 350F for about 15 min.)
2 sizes of styrofoam balls
Dowel (depending on the size of your styrofoam balls, my largest was 4" and I used a 1/4" dowel)
Floral foam
Ceramic pot
Spanish moss
Dark green spray paint
Lots of hot glue :)

It's all pretty self explanatory from there.  Anyways, it's nice to have a list of "ingredients" to any project.

 Now these beauties are proudly displayed on my entry way dresser.  Never underestimate the power of TEXTURE!


So tonight I get to join Kristyn from Lil' Luna and Kelli & Kristi from Lolly Jane Boutique for a fun Elmer's party with crafts and giveaways.  I'm so excited!  Stay tuned to see how it all turns out!


Linked to:
lil luna link party button

Thursday, October 27, 2011

Homework

I've promised friends I would post some of my homework on here so I took some pictures.  Here's a little look into things I have to work on for hours at a time as a design student.  As I'm starting my second year, I'm only finding that I get to spend more hours on my homework, but it's more directly related with my program and makes me even more excited to be an interior designer.


This is from a third quarter class called Fundamentals of Drawing.  The assignment was to set up a still life of seven objects with different textures.  This was done in charcoal.  I can tell you that before this class I was all stick figures, but now, if I really want to, I can apply more design theory into drawings.


This was a part of this quarter's assignments in a class called Design Development - Residential.  This assignment is called a Concept Board.  Sometimes on shows like Designers Challenge on HGTV (or DIY, I can't remember since we don't have cable anymore) you'll see designers with presentation boards.  This is not one of them.  A concept board just shows the look and feel a space is going for.  None of these items will actually be seen in the place we are designing.  


We had to write a concept statement and find the images that would help support that statement.  What do you think?  Did I make it happen?


This turned out to be a fun project, also from this quarter.  This is from my Image Manipulation class.  I like to just call it Photoshop because that's the only application we're learning.  This assignment was called the Collage Project.  We were supposed to have at least 3 images and use techniques we learned about (layers, layer masking, filters, etc.) to convey a message.  I'll admit, I did this when I was sick and it was a second attempt at the project.  So powering through Nyquil, I started with the piano, then added a sunset.  The color of the wood reminded me of fall so I added a leaf.  Fall made me think of time passing so I added a clock.  I created a transparent image of sheet music to tie it all together.  All in all, it symbolizes the passing of time and a bit of nostalgia.  

This last project made me think a lot once I got the critique back from my teacher (which was well received).  My teacher asked me, "What does the piano and music have to do with this?"  Some of you know that when I started college I was a music major.  I lived music for 2 years straight and got as much out of it as I think I possibly could have at the time.  After I graduated with an associates, my priorities changed.  I got married, had kids, and now 10 years after starting down the path of music, I find myself in a place I couldn't have imagined back then.  Interior design?  Who would have thunk?  I'm just as passionate about interior design as I was about music.  It's all about creativity right?  I'll never let that part of me go.

Me and my hubby in California


I'm glad I'm where I'm at today.  I've got a creative husband and two energetic kids that I love to play with.  I'm looking forward to this "new day" in life and can't wait for the holidays to start!  Like I said in my last post, once I'm done with my online class in two weeks, I'll have more time on my hands to craft and use that creative gene of mine.

I hope you enjoyed my homework :) Which did you like?

BOO!

I've been AWOL for a month?!  What happened to the last 30 days?  Oh that's right, school started again and we ALL got sick in our house.  In fact, I'm still trying to find my voice, but I'm well enough to realize that it's almost Halloween!  (It sneaks up on you!)


Here's a little wreath I made simply from tying ribbon around this styrofoam form.  Hot glue is your friend in this project.  Keep it simple! Keep it cute! I have to keep these things in mind until my online class is over in a couple of weeks.

You can see this wreath and many other "Fall" wreaths on the themed link up party at The CSI Project.


Visit thecsiproject.com

HAPPY HALLOWEEN!

Tuesday, September 27, 2011

Hospitality

Nothing makes me more excited than personalized means of courtesy while you're sleeping away from home.  When I came into the hotel with my husband for our 8th anniversary vacation in California, we found this on the vanity in our bathroom.  So, to honor this towel origami before taking it apart, I had to figure out how to put it back together again.  


 Courtesy of Hotel Current, here's how you make a shirt and tie out of bathroom towels.  I'm a visual learner so if you need more than pictures to explain what to do, don't hesitate to ask :)


Here's what you need.  Start with the larger towel.


The tie is with the smaller towel starting in a diamond position. 


Put this in your guest bathroom and you are sure to get some smiles!  Great hospitality never goes unnoticed.


Friday, September 23, 2011

Master Bedroom Mood Board

Thanks so much for the challenge Cassity at  *Remodelaholic*!  


On my board I focused on a fairly monochromatic theme with one additional color.  I love the minor contrast it creates throughout the space.  It makes the room feel calm, cool, and relaxing, just the way I think a master bedroom should feel.  The graphic theme is an interpretation of a radial pattern shown in the mirror, artwork, the arms of the chandelier, and if you want to get real technical, the tufts in the ottoman and the legs of the floor lamp.  Here's a screen shot of the items I used in the room:


Make sure you get over to *Remodelaholic* to see many other wonderful Master Bedroom creations.  Hopefully you'll find some inspiration to make your bedroom your favorite space.


My Olioboard

I have several blogs I like to follow.  In fact, my list is so long I break it up throughout the week so I'm able to check up on all of them.  I'd have to say at the top of my list is All Things Thrifty.  I love Brooke's style and she has so many creative home decor fix it ideas.  I'll show you another day how I recreated her DIY Window Valances


Yesterday as I was browsing the blogs, I noticed Brooke had joined a group of bloggers in a Master Bedroom Good Mood Board Challenge hosted by Cassity from Remodelaholic (another fave!). 


This is the kind of challenge that I practice at least 3 times a quarter at school, but I'm limited to the resources at our school.  The site to create a Mood Board is found at Olioboard.com.  I think I'm in love!  Here's what I came up with for a couple of home offices:


This site is very user friendly.  It's fun to dream up these creative rooms.  I've included a widget on the side of my site so you can keep up with all the different room styles I come up with.  

As for life, I've just finished this quarter's classes and the hubby and I are off to Long Beach, CA for our anniversary vacation.  Here's to 8 wonderful years!  School starts up again October 3rd with more challenges and more designing fun.  

Monday, September 19, 2011

15 Minutes

My mornings are generally pretty busy on a school day. Take today for instance. 5:00 - Husband kisses me before he leaves for work
5:30am - My alarm clock goes off. I immediately set it for 15 minutes later (snooze is broken) 5:45 - Alarm clock goes off again and I roll out of bed. 6:00 - I'm dressed and ready and head to {B}'s room to get her ready for school. I leave {T} in bed hoping she'll stay asleep until I actually have to leave. (It's just better to help one girl get ready than two at the same time.) 6:03 - After some coaxing, {B} sits up in bed and I realize she's peed through her diaper ... once again. 6:05 - {B} gets in the shower while I get her clothes ready. 6:06 - {T} comes out of her room ... figures. ("Mommy, I awake!") 6:10 - {B} gets out of the shower and doesn't like the clothes I picked for her (I thought uniforms was supposed to make things easier) 6:15 - {T} is dressed, {B} is dressed, time for breakfast 6:18 - Fruity Pebbles made and sitting in front of the girls for breakfast. 6:19 - {B} spills Fruity Pebbles on her shorts and she has to get changed. I make my bowl of Bran Flakes. (Come on fiber, work your magic!) 6:23 - {B} is changed into clean shorts and refuses to eat due to her bad temper (My words not hers. She becomes mute when she's upset) 6:25 - {B}'s lunch is made, can't find her lunch box and has to use my old bag 6:26 - {T}'s shoes are on 6:30 - Girls in car with {B}'s shoes and socks in hand 6:33 - I'm in the car with backpacks (mine and {T}'s), drills to return to in-laws, tabs for a friend Crap, forgot the keys again 6:35 - Out of the driveway 6:40 - {B} is dropped off at a friend's with one shoe still in hand and frown still on her face ("I love you! Have a good day!" {B} "hmph") 6:45 - return home to get something a classmate needs 7:15 - drop off {T} at in-laws
traffic 7:45 - Pick up classmate who doesn't have a car
more traffic 8:15 - walk into class 15 minutes late. I shouldn't have reset my alarm.


Happy Monday!

Saturday, September 17, 2011

Guests and Projects

I get so excited when we have guests coming over that I find the motivation to change things in my house.  There's a particular project that I've been wanting to do, but my husband hates moving furniture and equipment around so it's been put off for a very long time.

 My entertainment center is a big of an eyesore to me.  It was put together out of necessity when we moved in over a year ago.  I hate seeing the wires behind the TV, it looks like the monster in the room and it is constantly disorganized. I've had a new configuration in my head for a few months now, but never had the motivation to do it.  Apparently it takes guests coming in from Utah for me to find that motivation.

My mother-in-law's best friend was in town this week and my husband offered to make dinner. (He's my live in Bobby Flay. I'm so lucky!)  So the day that everyone is supposed to come over, I text my husband to see if he would be mad if I changed everything about the entertainment center.  He said as long as he didn't have to do anything it would be fine.  I put the phone down and went to work.

Four hours later and a break to pick up {B} from school, I was done.  Unfortunately, I couldn't finish the floating shelf above the TV before our guests came over because our drill doesn't have enough torque. (A new drill is on the Christmas list this year.)  My father-in-law came to the rescue with 2 different types of drills for us to choose from.  So after everyone left, I finished drilling and accessorizing so I could take this picture before I went to bed.
 The old shelf with doors needs to be taken somewhere else, but I'm glad the project got finished.  I feel much better when I watch TV now that everything is organized and I can display pretty things in a much nicer less messy way.

On account of finishing projects, here's another beauty I finished and posted to craigslist today!


 If you're interested in buying this, here's the official post:


Now I'm off to enjoy the rest of my Saturday (aka finish homework before Monday morning's class)

Wednesday, September 14, 2011

My Favorite time of the day & recent Big Reveal!

So it's {8:00} and the kiddos are in bed.  THIS is my favorite time of the day.  I start it with a big sigh and quickly find a comfy place to sit.  Tonight's comfy place is the nice computer chair in front of "the big" computer (which is usually occupied by my husband doing homework).  I say big because it's a 27" Mac screen monitor.  When I sit at this computer I'm motivated to work on pictures.  So, I've decided to finally post my reveal of my first, full-on design project . . . {B}'s room!

My oldest daughter is 7 now and her newest adventure is loosing her front teeth.  Hopefully we'll survive tomorrow when I take her to the dentist and probably get a couple more ripped out . . . a job I will never do myself. *shudder*

So here are some before pictures and challenges I had before I started the room.


 First, the obvious.  The color came with the house.  We gave {B} the option to change it sine we were painting other rooms before we moved in, but she said she liked it, so pink it stayed.  It's like someone planted a pepto bismol bomb in the room and let 'er go!  Unfortunately, the bedding she had matched perfectly.  Another unfortunately is that the lamp was lined with pink inside, so it only projected more pink on the walls.

Piece of school education that led me to solving this hot pink mess:
Color Theory was a fun experience.  I found that mixing colors is harder than it looks.  I also learned about a study in red that experimented on prison mates and their exposure to the color red.  They put the prisoners in an all red cell to see how they would react.  Overtime, the prisoners became more aggressive.  Then my teacher asked what they found when they put the prisoners in a pink cell.

Anyone . . .

                                           anyone . . .

they had the same result.  That was the final straw.  I decided to design a room that wouldn't give my daughter any more excuse to become an "aggressive prisoner" because of her room.

So the problems are:
1. Hot pink paint color
2. Hot pink lamp
3. Damaged desk top
4. No shelves!

Solutions:

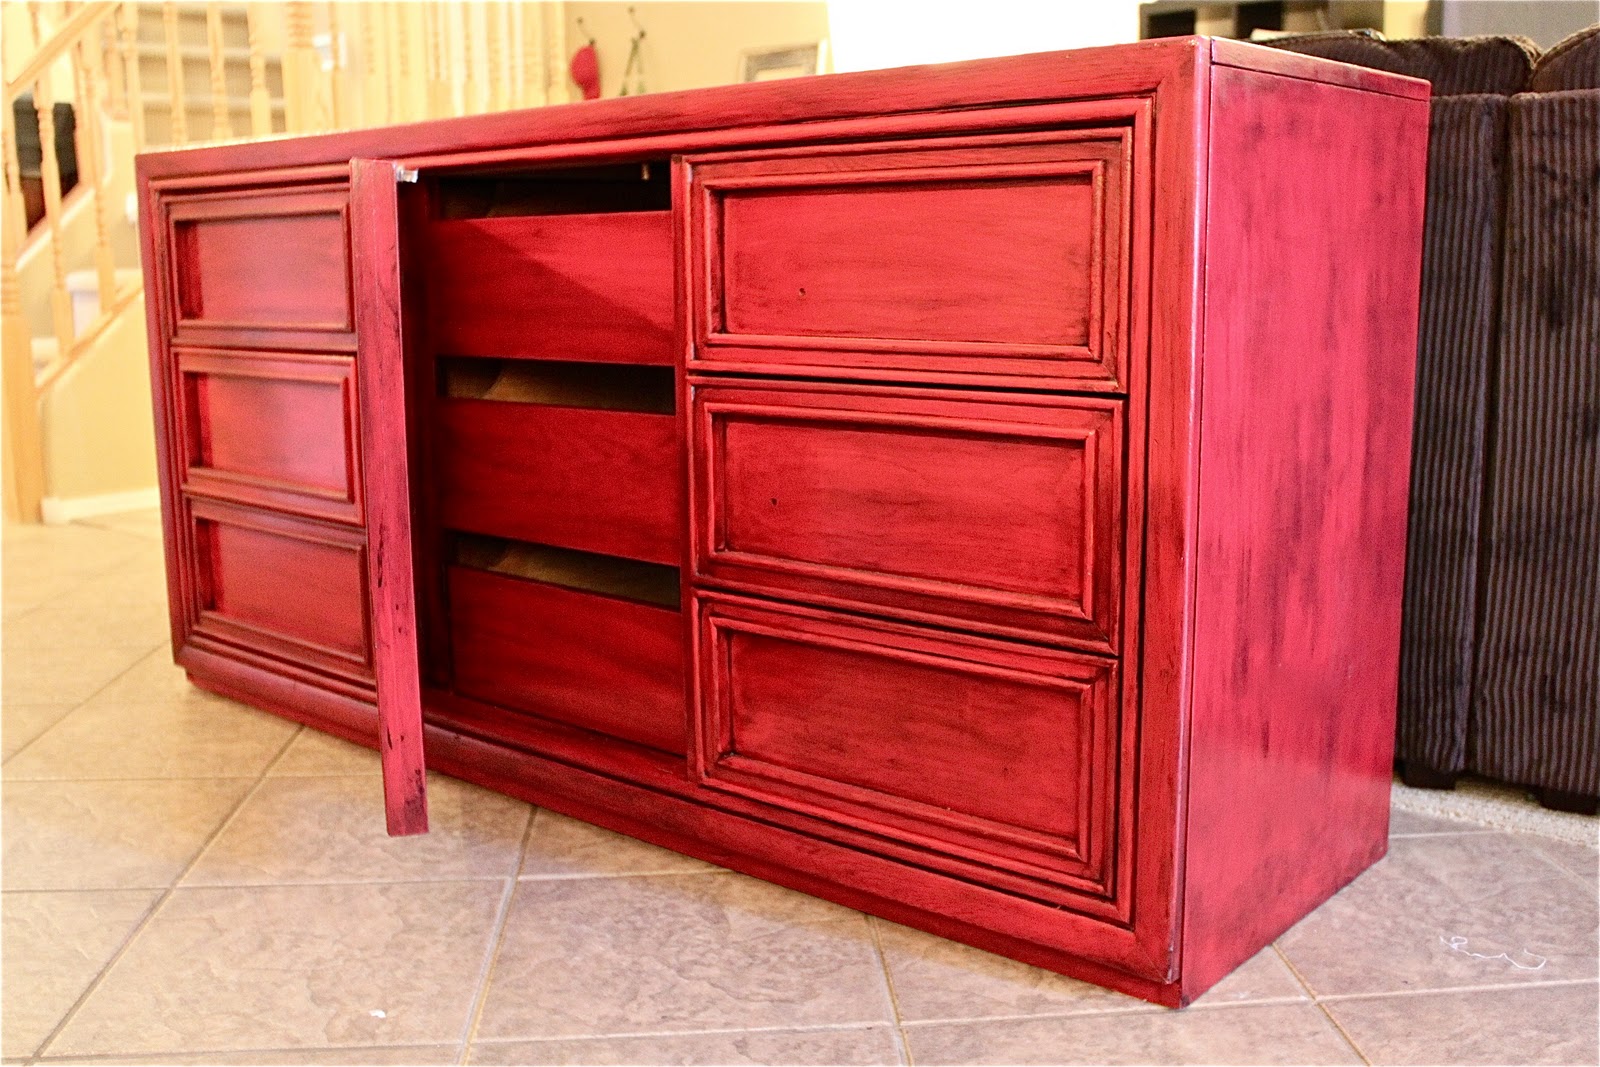
#1 I tried to tone it down at first adding purple.  I got the purple circles on the wall at JoAnn's and DIYed the dresser.  But still, like I said, it was a hot pink mess.

I also learned in color theory that green was associated with calmness and nature and decided then and there that {B}s room was going to be green.  Not just any green, a two toned horizontal pattern green.  You'll see in the pictures below.

#2.  Her desk in her room has travelled with us in at least two moves and has the wear to show it.  This IKEA desk was once a nice smooth top, but soon showed us it's "true colors" of particle board . . . not so pretty.


Solution:
CONTACT PAPER!


I got this paper from Home Depot for about $6 for the roll.  A little measuring, matching up, cutting and one Sesame Street episode later, this sucker was on there for good.  Now we're back to the nice smooth top with more of a decorative feature.


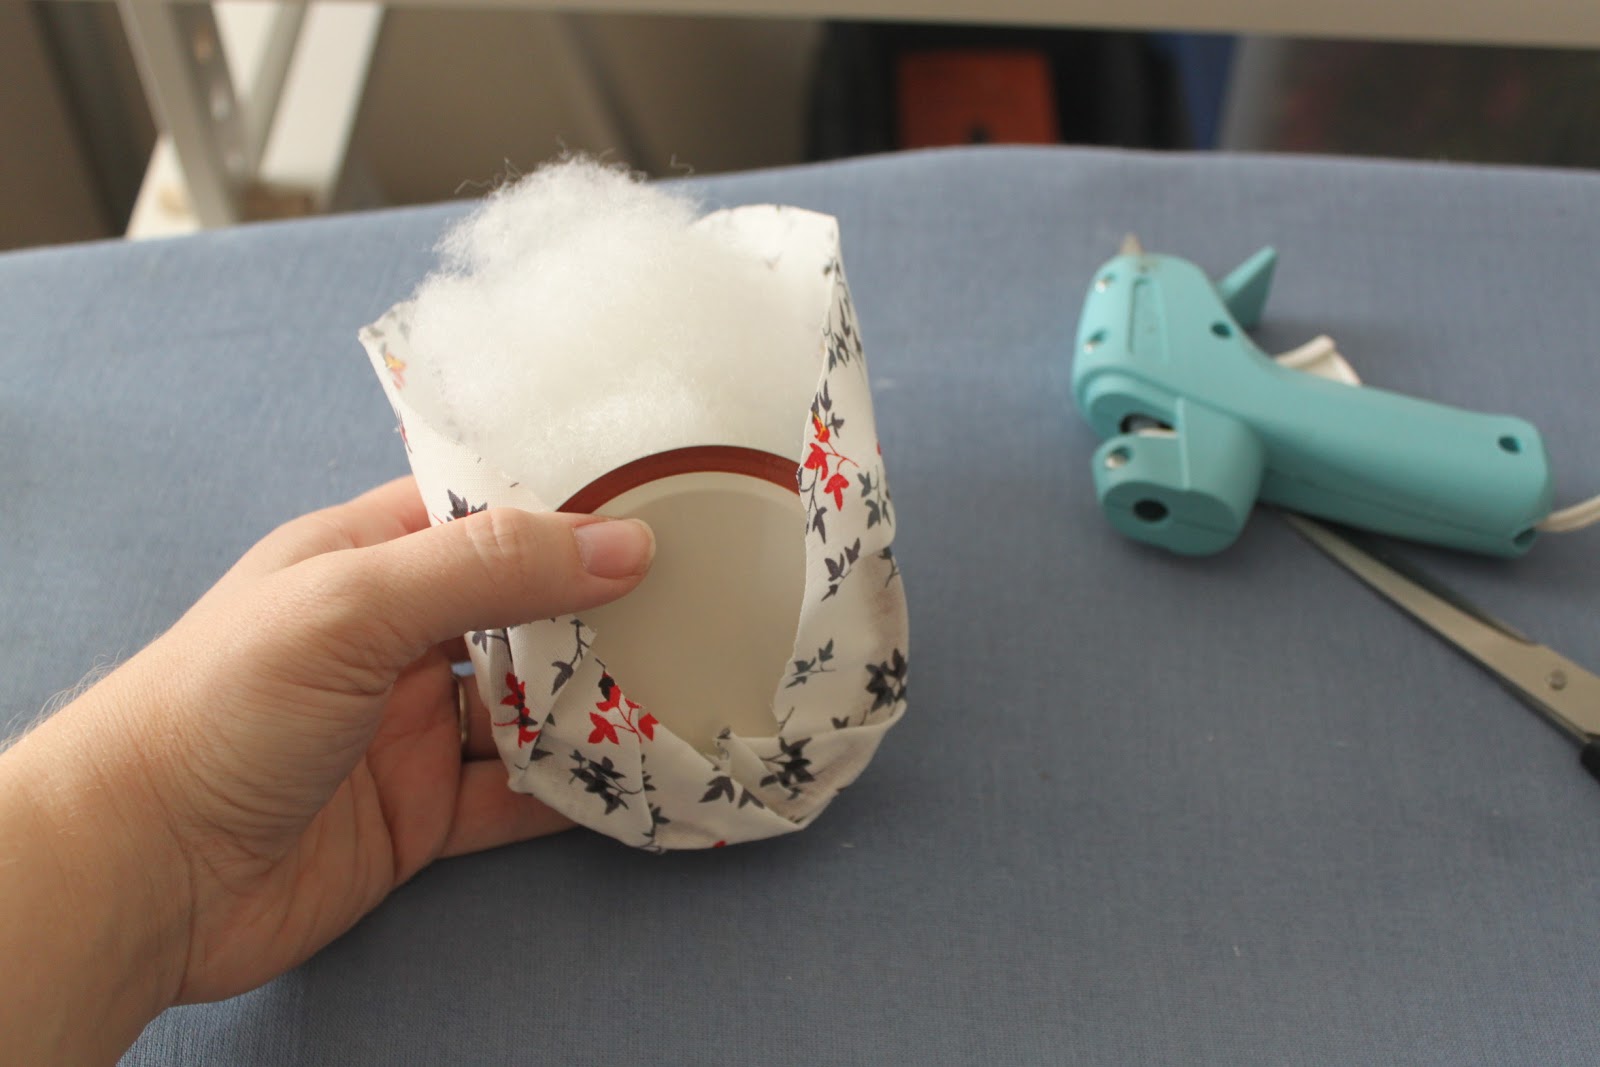
#3 The lamp from before came from Goodwill and was fun for . . . about a week.  Oh well, lighting for 8 bucks isn't bad.  Here's a fun little DIY I thought of when we were shopping for accessories together. We found this mobile at Hobby Lobby in the clearance section for $8 and I thought, "Well, I'm sure I can find a good use for this somewhere."  It wasn't until a week before I started painting till I thought of using it for a lamp shade.  All I needed was to find a good lamp base and a top to a drum shade or bars that would support the ring.  Thanks again Goodwill for my $12 find!  So this project totaled to $20.  Not bad for a 27" lamp :)


#4 I had a book shelf that we used before, but she always had it so cluttered so I bought some bins for those tiny things that made it so messy.  And now she has a floating shelf to store her favorite things that she doesn't want her little sister to touch.

Another side note:  I made the curtains and had fun doing it, but I think after my 2 weeks I spent sewing my own curtains for my whole house, I'm rethinking my career as a professional seamstress.  I better just stick to designing and let the professionals do their job.


So here is her room completed!  I kept one of the stripes from one wall and wrapped it around the whole room to make the space more cohesive.  Horizontal stripes also give a sense of stability and purpose, two attributes I hope {B} gains in life.


{B} loves her room and loves to show anyone who comes over what her "new" room looks like.  She does a very good job keeping it clean and doesn't complain so much when we send her to her room.

Thank you {B} for being such a good girl and letting me take over your room for a weekend!